HPE DL380 Gen10部署ESXi 8.0 U2后风扇转速过高问题

这周新入手DL380 Gen10一台,配置为,

  • 2 x Intel Xeon Silver 4110
  • 2 x 64G DDR4 LRDIMM 2133 MHz
  • 8 x 2.5″ SFF
  • 8 x 2.5″ NVMe
  • 2x 500W 80 Plus Platinum

插入两个240G HPE SSD,两个400G HPE NVMe。在将HPE定制版ESXi 8.0 U2安装到SD卡后,风扇转速一直处于30%以上。查看iLO中的System Information – Health Summary页面,发现AMS (Agentless Management Service) 状态为Not available,Power & Thermal – Temperature Information页面上也没有SSD和NVMe磁盘温度信息,其他硬件的温度均处于正常状态。猜测应该是iLO无法从ESXi接收到系统健康信息从而只能将风扇运行在较高转速状态以保证系统温度处于一定范围内。

在网上搜索一番后,根据HP社区的这篇帖子(https://community.hpe.com/t5/proliant-servers-ml-dl-sl/ams-not-available-in-ilo/td-p/7181613),猜测为AMS没有安装,或者没有启动所造成的问题。

SSH登录到ESXi主机,使用命令esxcli -s software component list|grep ‘amsd’,发现amsd的确没有安装,随即根据官方HPE Agentless Management Bundle for ESXi for HPE Gen10 and Gen10 Plus Servers下载安装amsd,重启ESXi。再次SSH登录到ESXi主机,使用命令/etc/init.d/amsd status,发现四个amsd服务处于not start状态,尝试手动启动未遂。检查/var/log/amsd.log,发现如下日志,

2024-06-19T16:41:18.472Z In(30) amsd[1050527]: smad: ERROR: Missing ilo driver.
2024-06-19T16:41:28.716Z In(30) amsd[1050705]: amsd: ERROR: Missing ilo driver.
2024-06-19T16:41:38.924Z In(30) amsd[1050957]: ahsd: ERROR: Missing ilo driver.
2024-06-19T16:41:49.180Z In(30) amsd[1051205]: smarev: ERROR: Missing ilo driver.

从官方HPE iLO Native Driver for ESXi 7.0下载最新版本iLO ESXi驱动(ESXi 8.0也适用)并安装,重启ESXi。SSH至ESXi主机,验证amsd服务处于运行状态。等待几分钟后,iLO页面显示AMS为OK状态,硬盘的温度也能正常显示,并且风扇的转速也降到11%。

部分命令,

# install amsd
[root@dl380-n1:/] esxcli software component apply -d /vmfs/volumes/66730501-6c4754a2-f480-08f1ea8cd12c/amsdComponent_701.11.10.0.4-1_23433471.zip
Installation Result
   Message: The update completed successfully, but the system needs to be rebooted for the changes to be effective.
   Components Installed: 701.11.10.0.4-1OEM.701.0.0.16850804
   Components Removed:
   Components Skipped:
   Reboot Required: true
   DPU Results:
# install iLO driver
[root@dl380-n1:/] esxcli software component apply -d /vmfs/volumes/66730501-6c4754a2-f480-08f1ea8cd12c/ilo-driver_700.10.8.2.2-1OEM.700.1.0.15843807_22942561.zip
Installation Result
   Message: The update completed successfully, but the system needs to be rebooted for the changes to be effective.
   Components Installed: ilo-driver_700.10.8.2.2-1OEM.700.1.0.15843807
   Components Removed:
   Components Skipped:
   Reboot Required: true
   DPU Results:
# verify
[root@dl380-n1:/var/log] esxcli software component get -n amsdComponent
amsdComponent_701.11.10.0.4-1
   Name: amsdComponent
   Display Name: Agentless Management Service Daemon for Gen10 and Gen10Plus
   Version: 701.11.10.0.4-1
   Display Version: 701.11.10.0.4-1
   VIBs: HPE_bootbank_amsd_701.11.10.0.4-1OEM.701.0.0.16850804
   Vendor: HPE
   Summary: amsdComponent: Agentless Management Service for Gen10 and Gen10Plus
   Severity: general
   Urgency: important
   Category: enhancement
   Release Type: extension
   Kburl: http://www.hpe.com
   Description: Agentless Management Service for Gen10 and Gen10Plus
   Contact: HPEVMwareSupport@groups.ext.hpe.com
   ReleaseDate: 03-06-2024
   Platforms: host

[root@dl380-n1:~] /etc/init.d/amsd status
amsd-smarev is running 1718816466 1
amsd-ahsd is running 1718816465 1
amsd-amsd is running 1718816464 1
amsd-smad is running 1718816463 1

Attach disk to ZFS mirror on Solaris

I have a ZFS pool (mirror) with two SATA disks on Solaris 11 running on my HP Microserver Gen8. Both of the disks are Toshiba 3T desktop disk, and they are more than 4 years old. The pool stores all my photos so I think I’d better add one more disk to back it up.

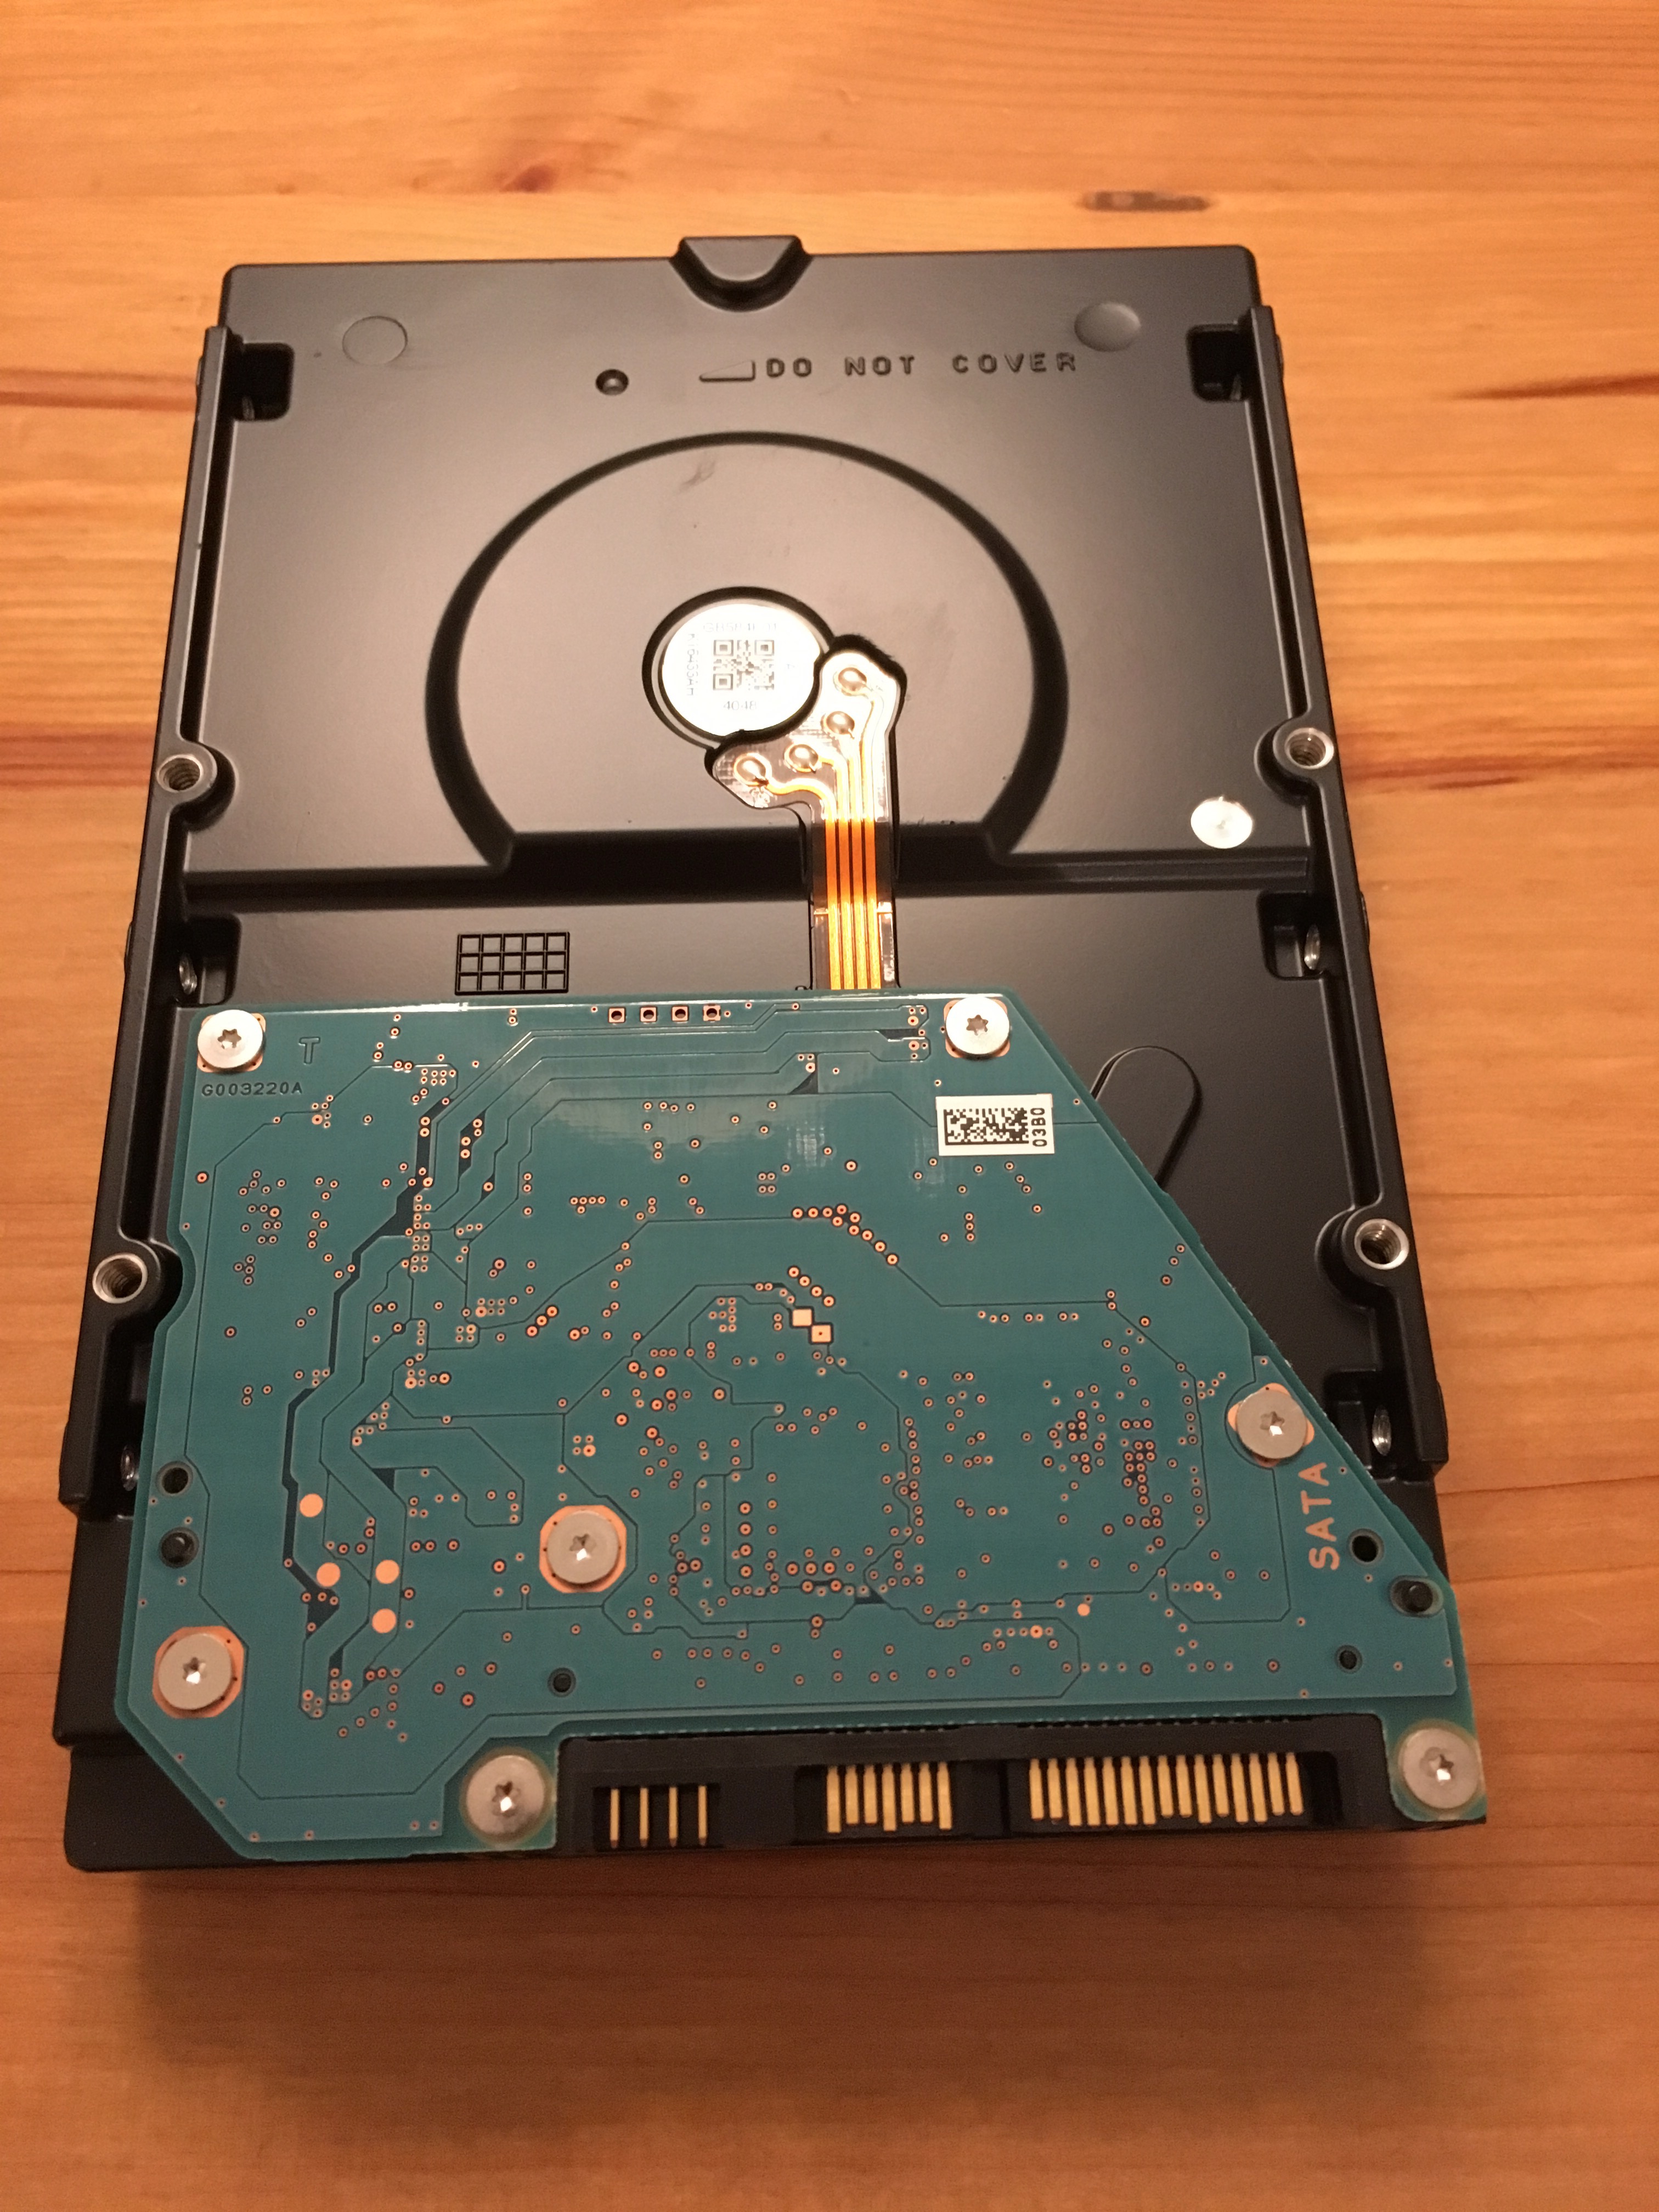
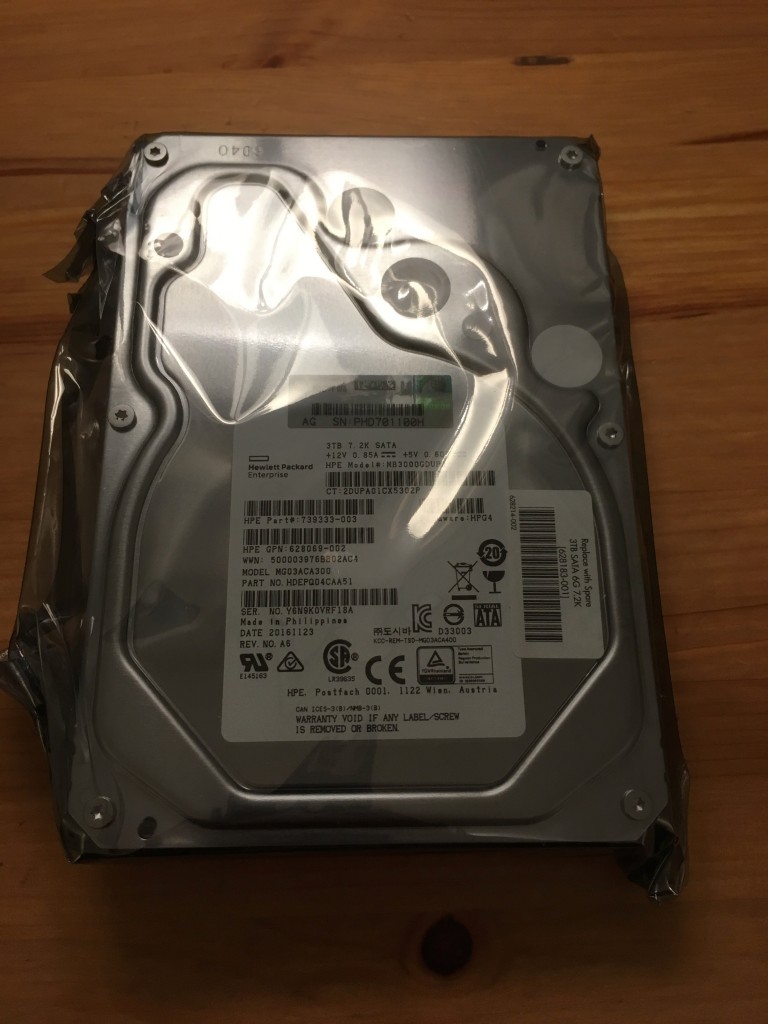
I purchased HP Disk (6G SATA Non-Hot Plug LFF (3.5-inch) Midline (MDL) Drives), which is recommended on Gen8’s Specs (628065-B21, https://www.hpe.com/h20195/v2/GetPDF.aspx/c04128132.pdf), and it comes with 1 year warranty.

HP-Disk-1

HP-Disk-2

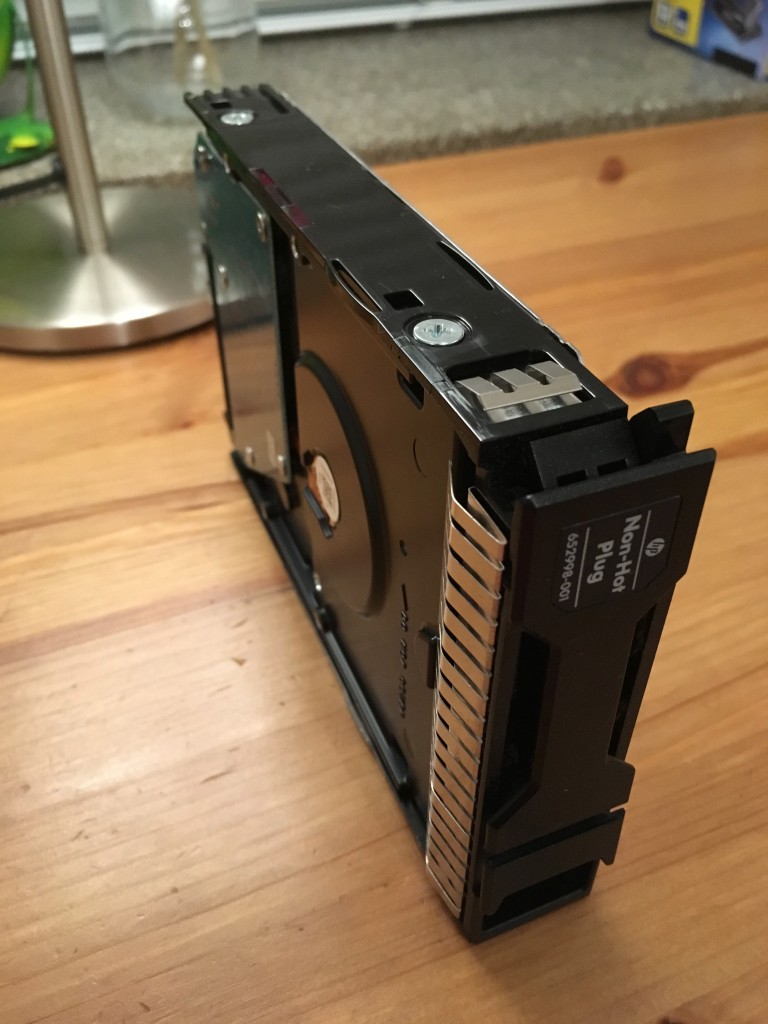
Mount the disk to the career
HP-Disk-3-Mounted

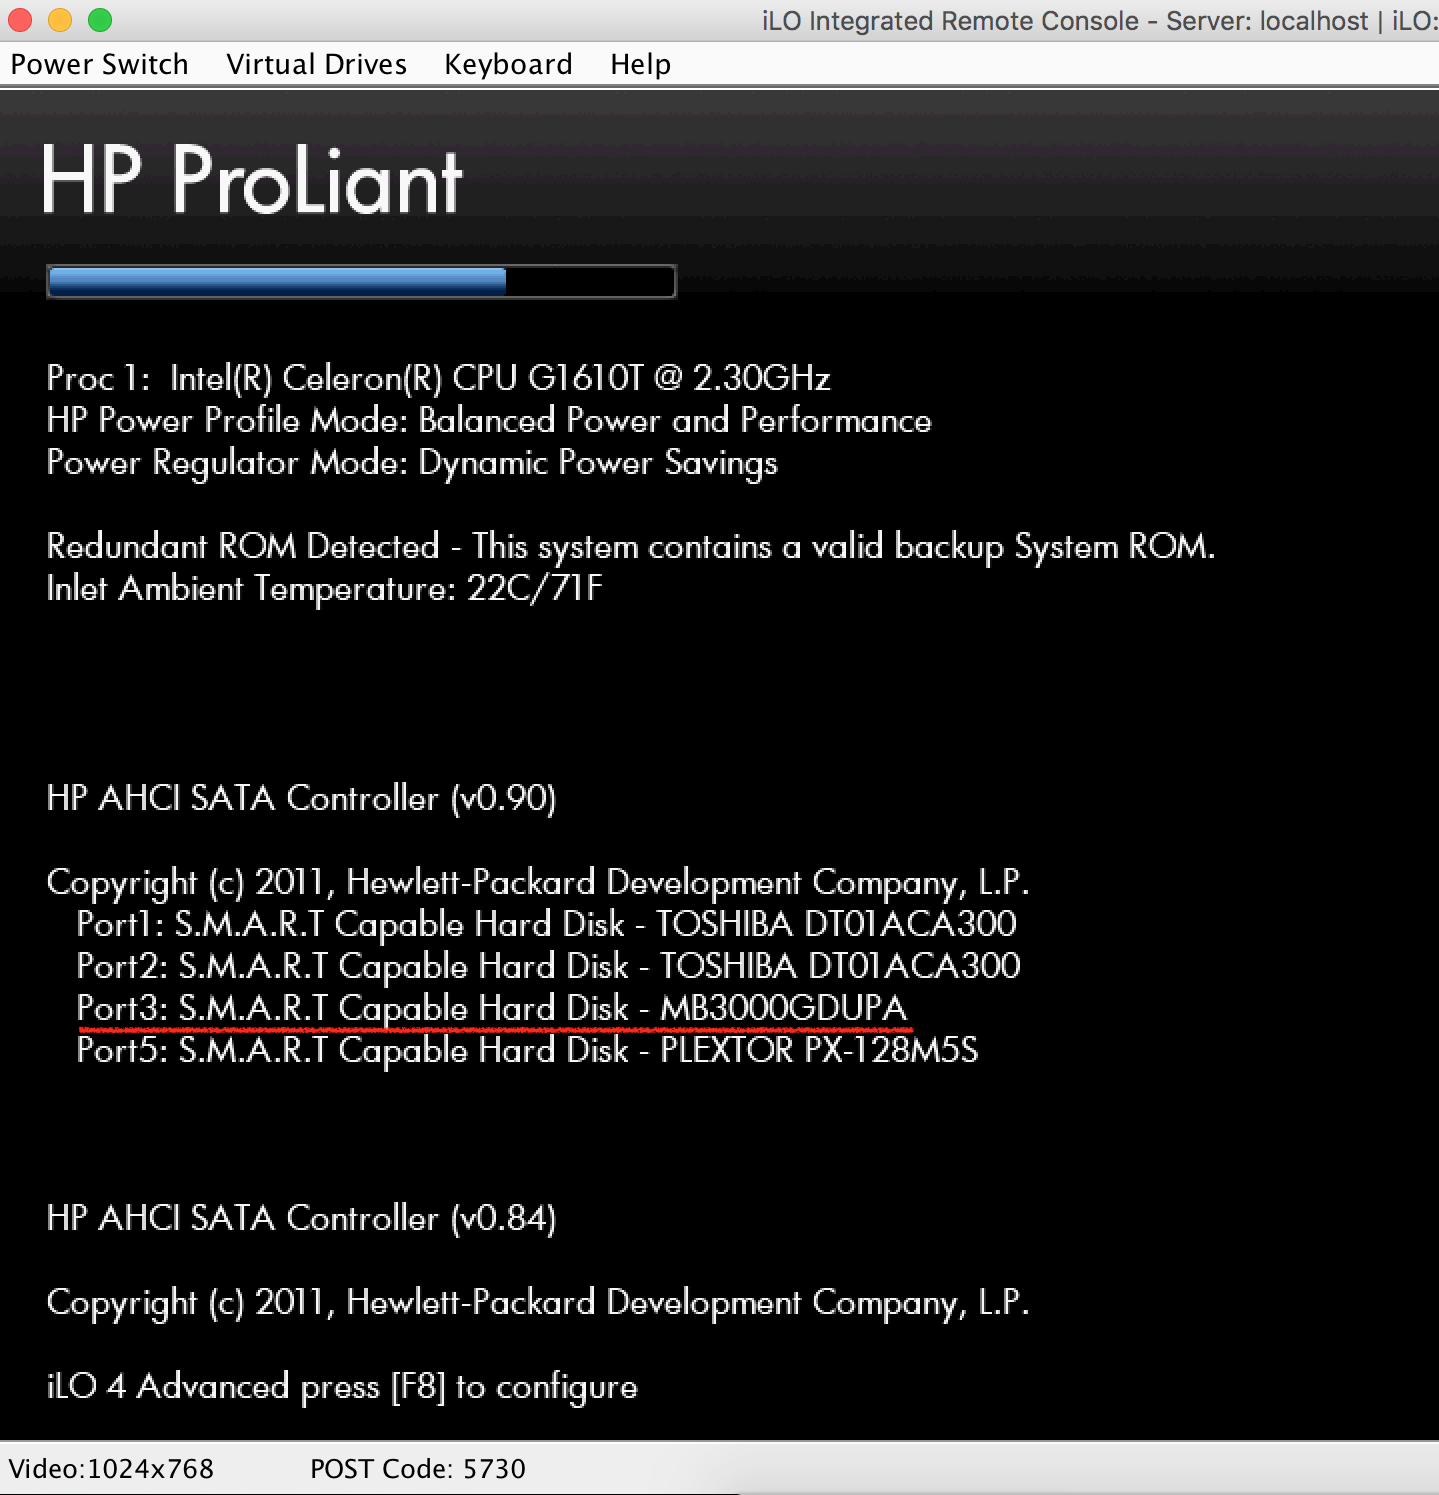
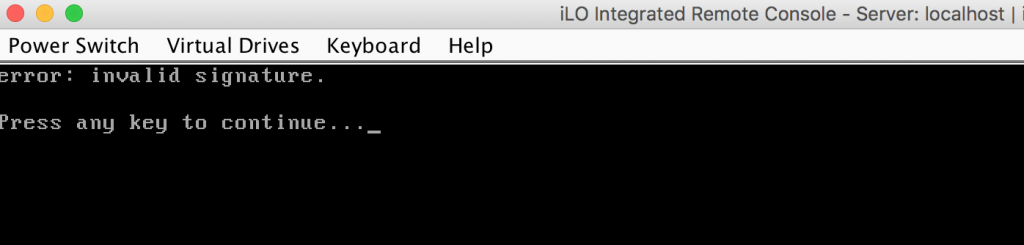
Insert the career into Gen8 and power it on, you can see from the POST screen that the new disk is detected by Gen8.
HP-Disk-4-Bootscreen

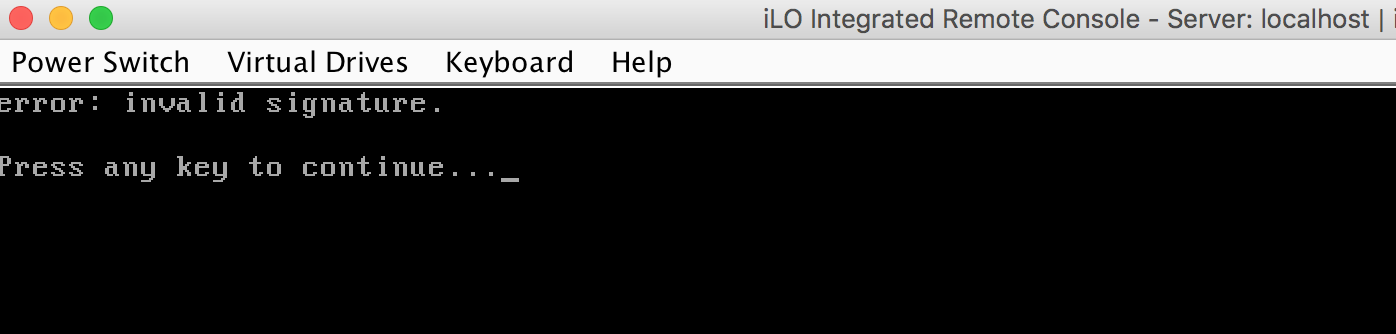
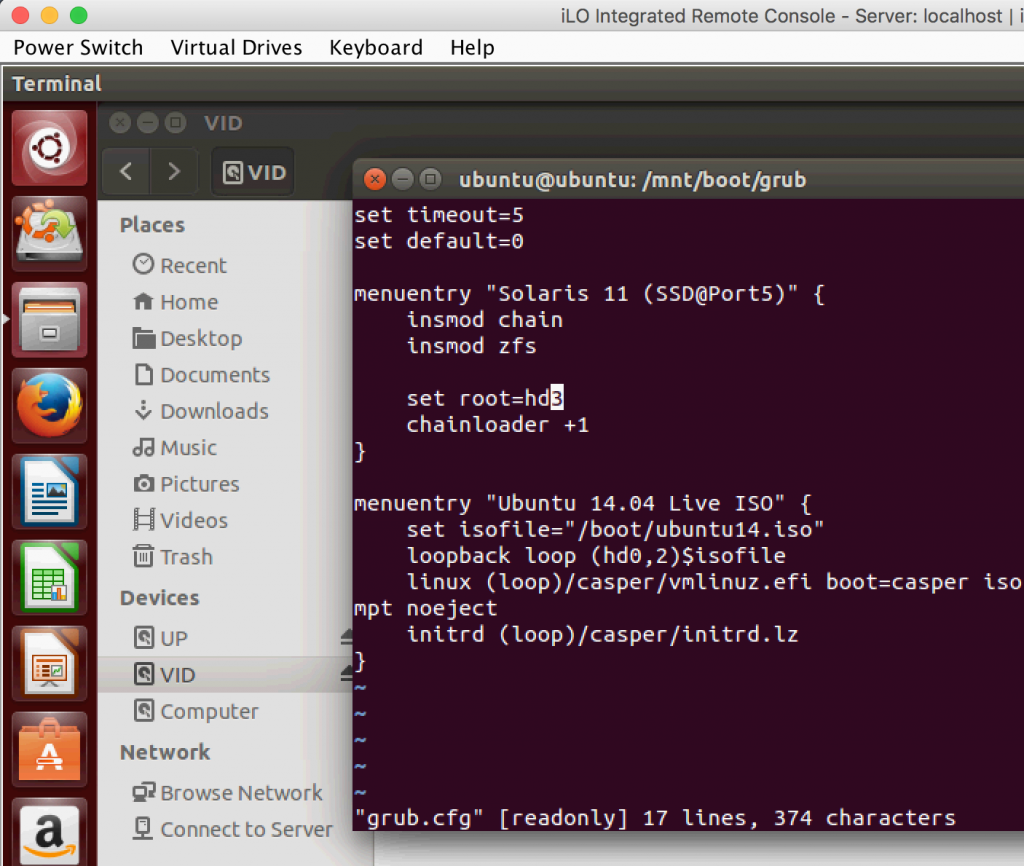
But, GNU GRUB failed to boot the Solaris.
HP-Disk-6-grub-invalid-signature

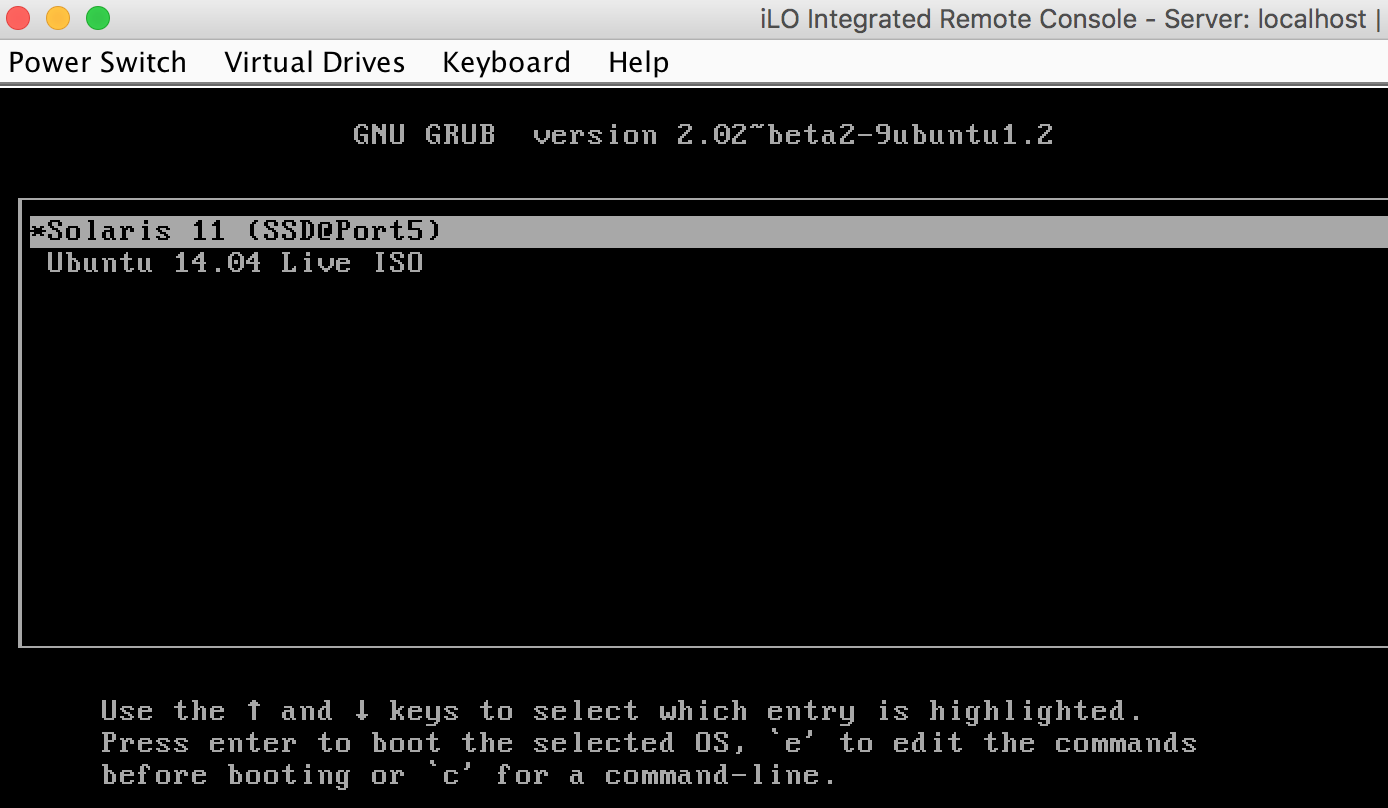
I installed Solaris 11 on my PLEXTOR SSD, which was connected the Port 5 (originally designed for Optical Drive) on MicroServer Gen8. Gen8 does not support boot directly from Port 5, but does support boot from internal Micro SD card. So I installed GNU GRUB on SD card, then boot the Solaris 11 which was installed on SSD at port 5.
HP-Disk-5-grub-screen

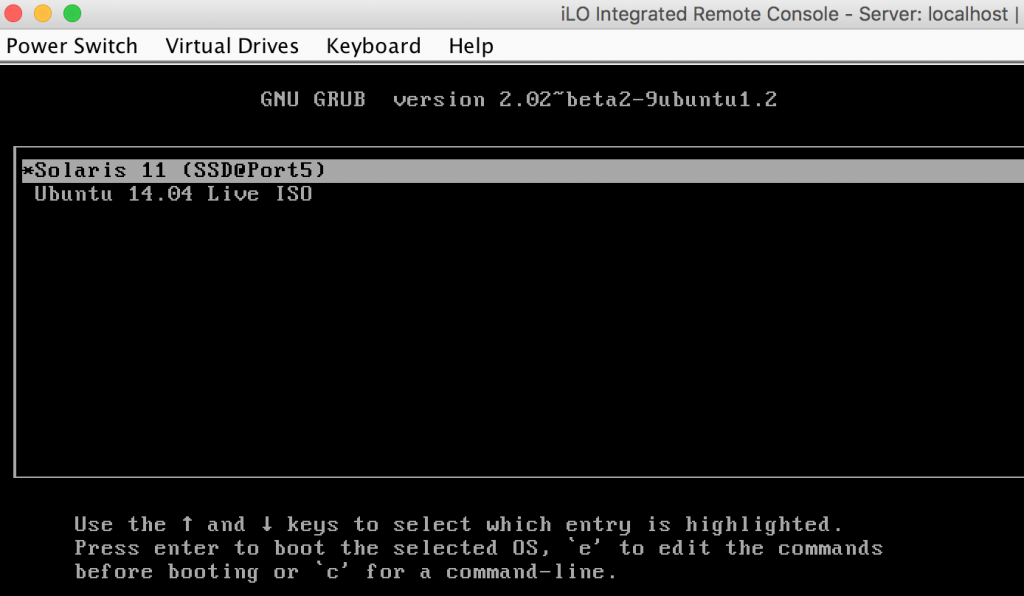
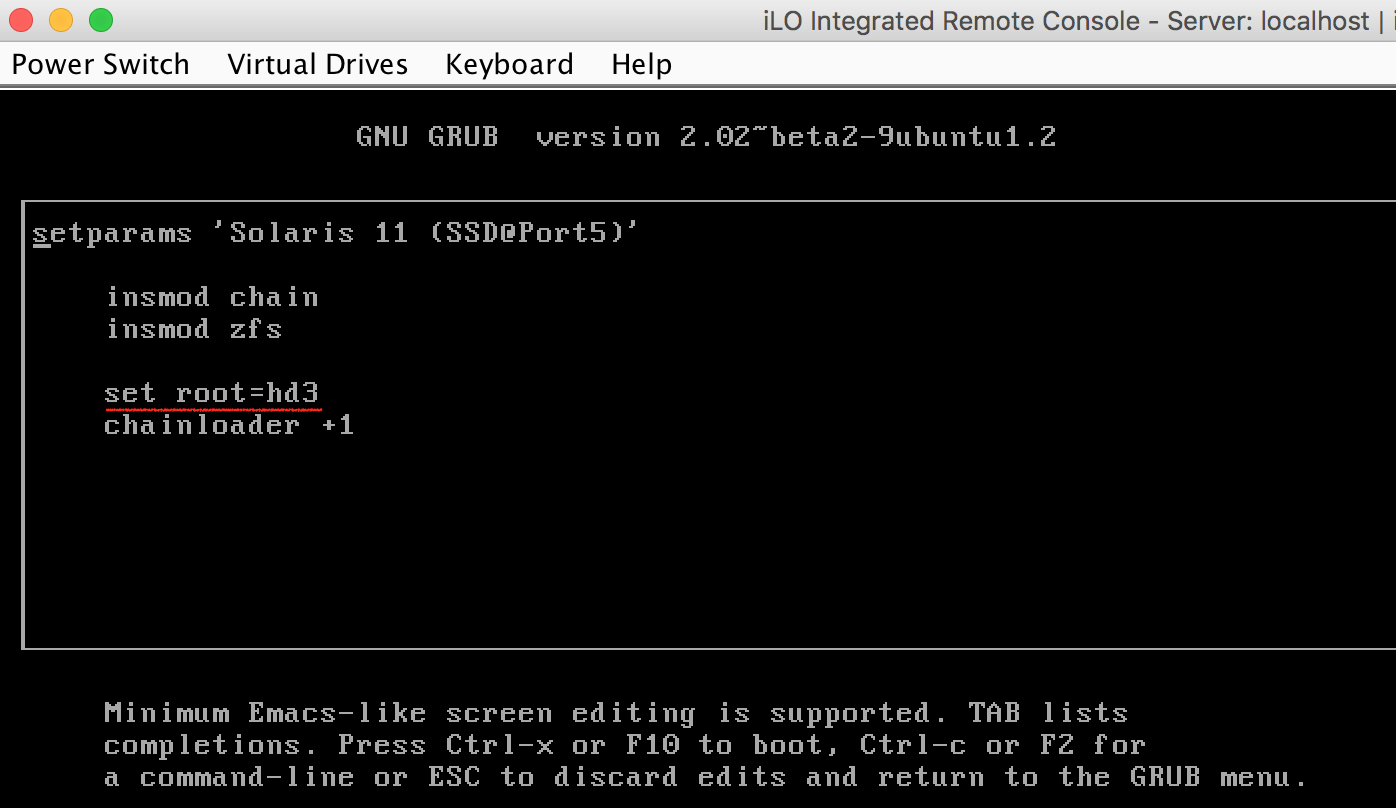
Because I added a new disk, so the order of the SSD at port 5 had been changed from 3 to 4.
HP-Disk-7-grub-edit

The fix is simple. Power off Gen8, remove the SD card, mount it to your system (eg: Macbook), update the order number of the SSD in GRUB configuration file at /boot/grub/grub.cfg, then re-install the SD card, boot successfully!
HP-Disk-8-grub-fix

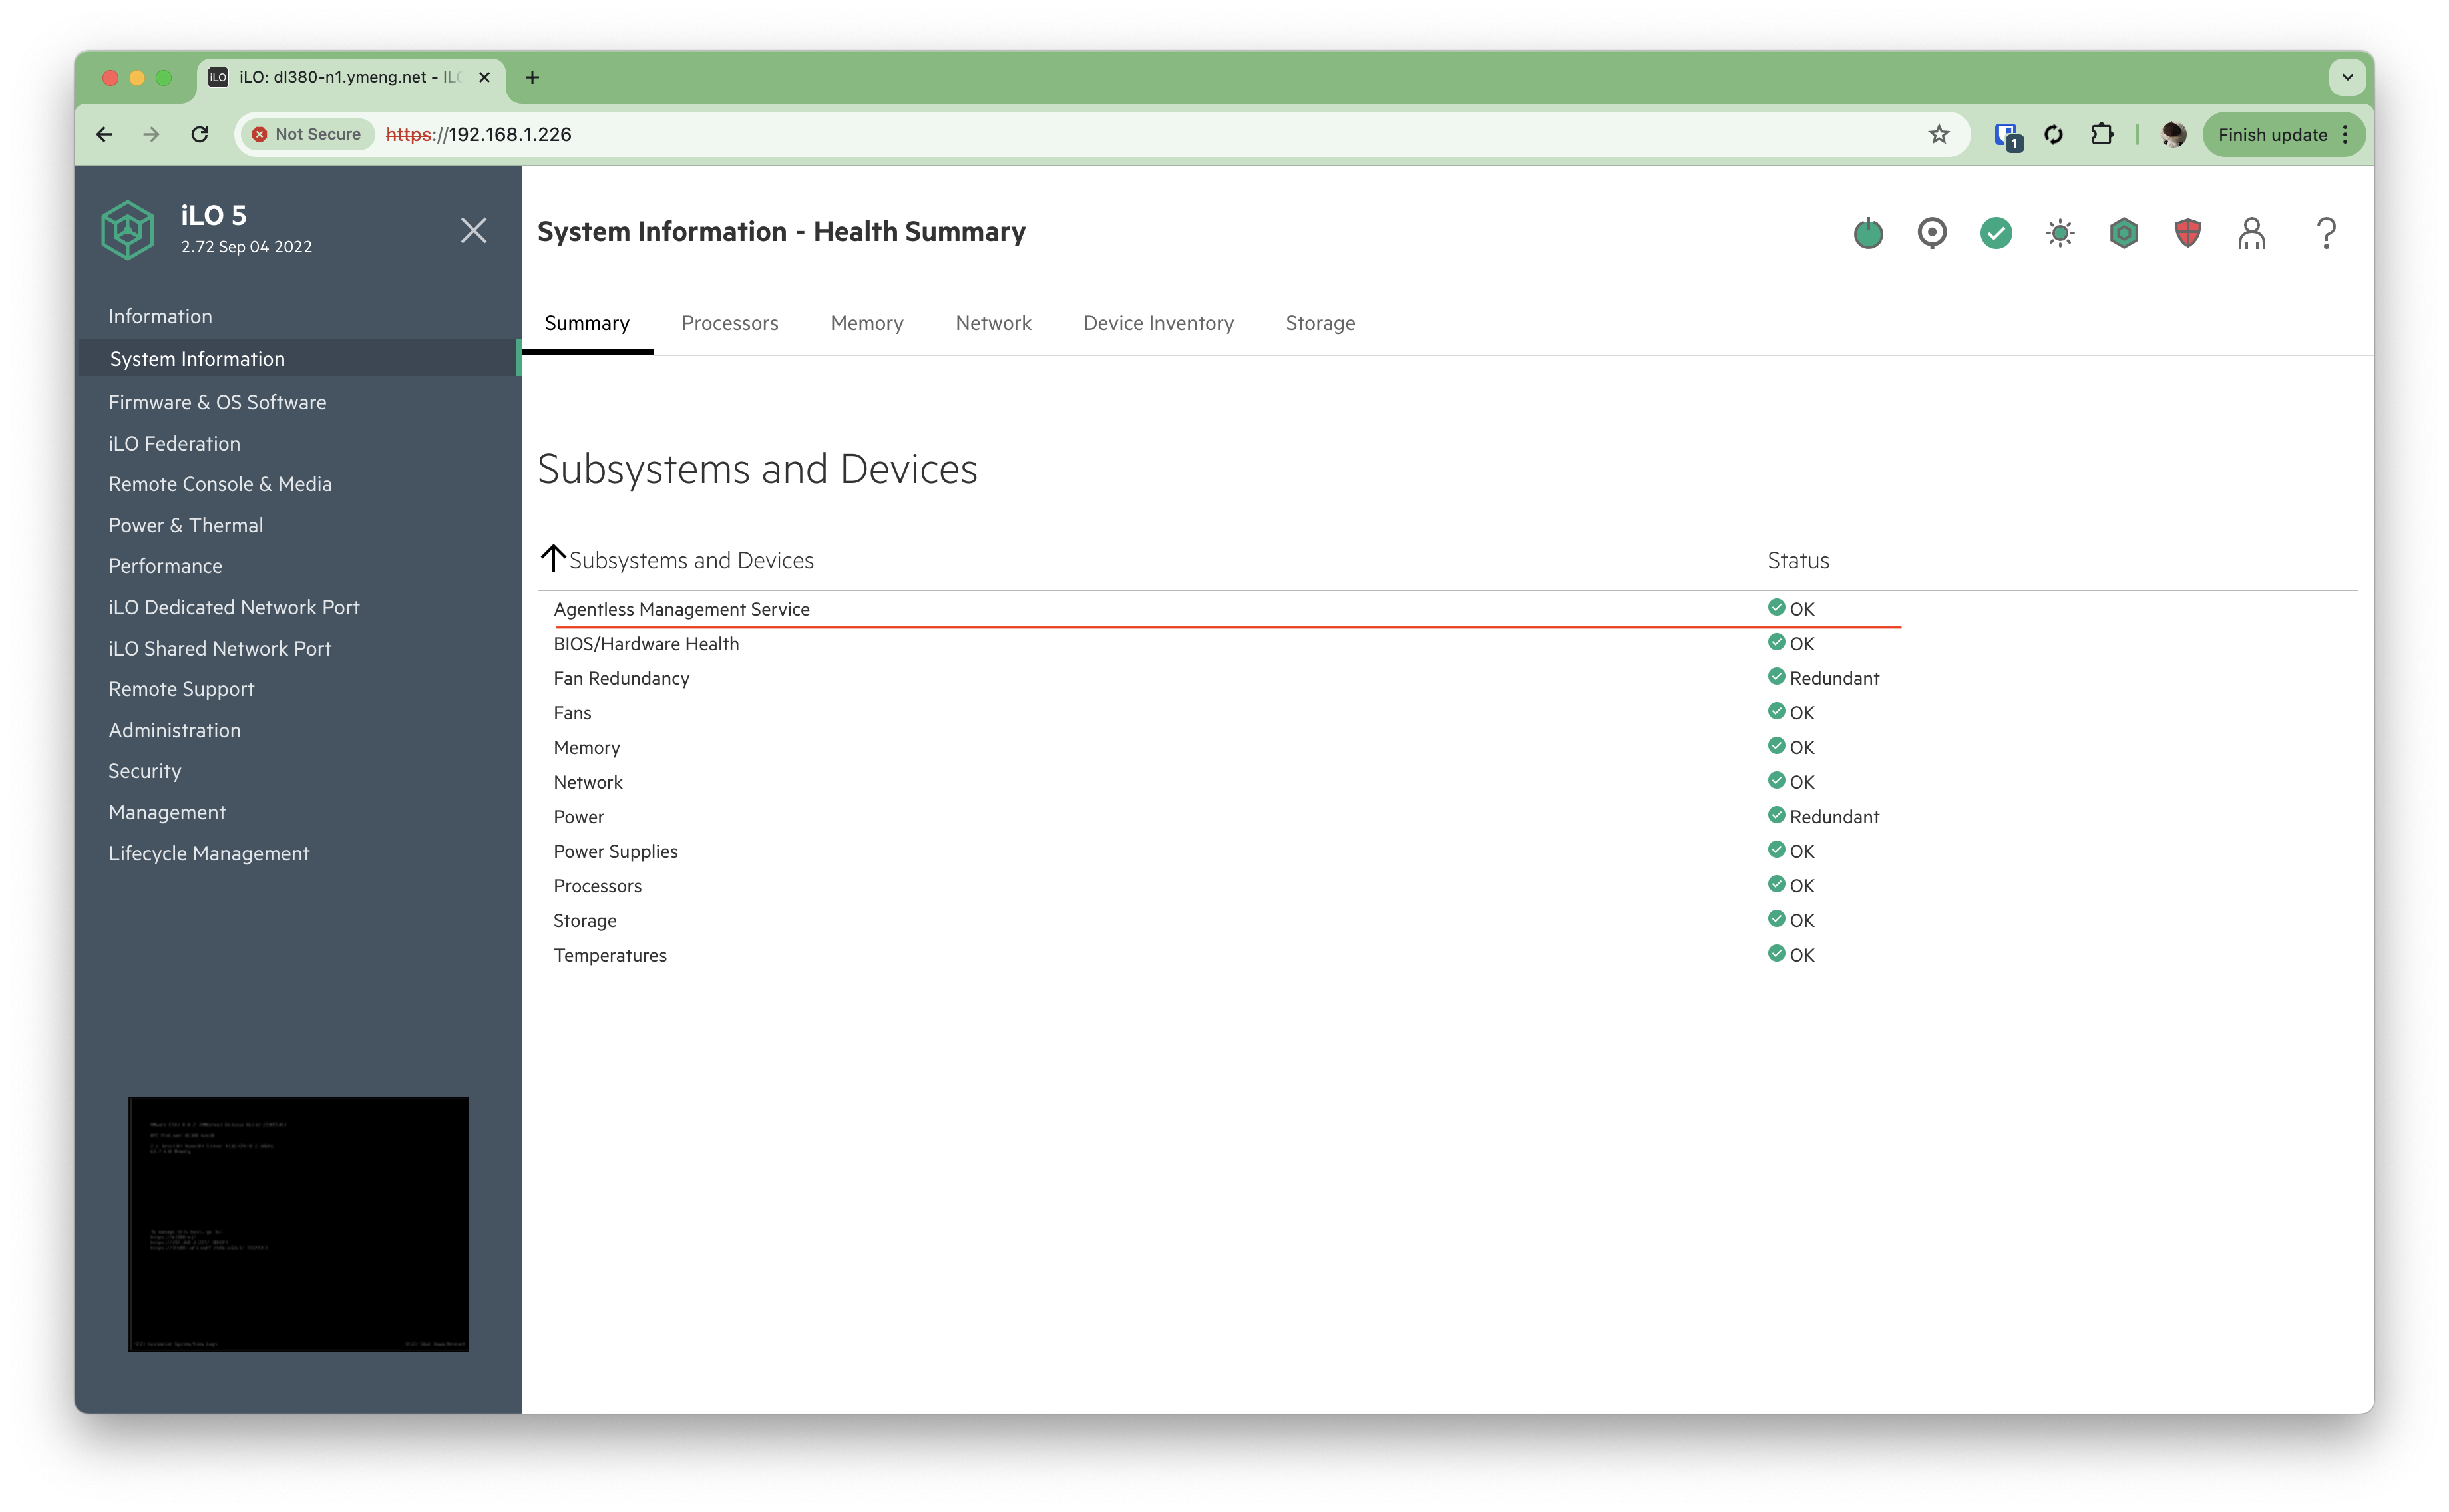
After logged into Solaris, list the zpool and its status

root@solar:~# zpool list
NAME    SIZE  ALLOC   FREE  CAP  DEDUP  HEALTH  ALTROOT
rpool   118G  14.2G   104G  12%  1.00x  ONLINE  -
sp     2.72T   315G  2.41T  11%  1.00x  ONLINE  -
 
root@solar:~# zpool status
  pool: rpool
 state: ONLINE
  scan: none requested
config:
 
        NAME      STATE     READ WRITE CKSUM
        rpool     ONLINE       0     0     0
          c3t4d0  ONLINE       0     0     0
 
errors: No known data errors
 
  pool: sp
 state: ONLINE
  scan: scrub repaired 0 in 3h51m with 0 errors on Sat Aug  5 13:02:29 2017
config:
 
        NAME        STATE     READ WRITE CKSUM
        sp          ONLINE       0     0     0
          mirror-0  ONLINE       0     0     0
            c3t0d0  ONLINE       0     0     0
            c3t1d0  ONLINE       0     0     0
 
errors: No known data errors

You can see here I have one pool named *sp* which is a mirror (mirror-0) which was build over two disks, c3t0d0 and c3t1d0.

Then use format to identify the new disk.

root@solar:~# format
Searching for disks...done
 
c2t0d0: configured with capacity of 1.83GB
c2t0d1: configured with capacity of 254.00MB
 
 
AVAILABLE DISK SELECTIONS:
       0. c2t0d0 <hp iLO-Internal SD-CARD-2.10 cyl 936 alt 2 hd 128 sec 32>
          /pci@0,0/pci103c,330d@1d/hub@1/hub@3/storage@1/disk@0,0
       1. c2t0d1 </hp><hp iLO-LUN 01 Media 0-2.10 cyl 254 alt 2 hd 64 sec 32>
          /pci@0,0/pci103c,330d@1d/hub@1/hub@3/storage@1/disk@0,1
       2. c3t0d0 <ata -TOSHIBA DT01ACA3-ABB0-2.73TB>
          /pci@0,0/pci103c,330d@1f,2/disk@0,0
       3. c3t1d0 </ata><ata -TOSHIBA DT01ACA3-ABB0-2.73TB>
          /pci@0,0/pci103c,330d@1f,2/disk@1,0
       4. c3t2d0 </ata><ata -MB3000GDUPA-HPG4-2.73TB>
          /pci@0,0/pci103c,330d@1f,2/disk@2,0
       5. c3t4d0 </ata><ata -PLEXTOR PX-128M5-1.05-119.24GB>
          /pci@0,0/pci103c,330d@1f,2/disk@4,0
</ata></hp>

The disk with ID c3t2d0 is the one I just added to Gen8.

Attach the new disk into existing pool.

root@solar-1:~# zpool attach sp c3t1d0 c3t2d0

Check the status of pool again

root@solar-1:~# zpool status -v
  pool: rpool
 state: ONLINE
  scan: none requested
config:
 
        NAME      STATE     READ WRITE CKSUM
        rpool     ONLINE       0     0     0
          c3t4d0  ONLINE       0     0     0
 
errors: No known data errors
 
  pool: sp
 state: DEGRADED
status: One or more devices is currently being resilvered.  The pool will
        continue to function in a degraded state.
action: Wait for the resilver to complete.
  scan: resilver in progress since Sat Sep 30 01:30:55 2017
    315G scanned
    39.2G resilvered at 119M/s, 12.42% done, 0h39m to go
config:
 
        NAME        STATE     READ WRITE CKSUM
        sp          DEGRADED     0     0     0
          mirror-0  DEGRADED     0     0     0
            c3t0d0  ONLINE       0     0     0
            c3t1d0  ONLINE       0     0     0
            c3t2d0  DEGRADED     0     0     0  (resilvering)
 
device details:
 
        c3t2d0    DEGRADED        scrub/resilver needed
        status: ZFS detected errors on this device.
                The device is missing some data that is recoverable.
           see: http://support.oracle.com/msg/ZFS-8000-QJ for recovery
 
 
errors: No known data errors

Here it shows that the pool is *DEGRADED*, and it is resilvering, that means it is copying data from the existing disks to the new one, and it gives the size of data and estimation.

After the resilvering finished

root@solar-1:~# zpool status -v
  pool: rpool
 state: ONLINE
  scan: none requested
config:
 
        NAME      STATE     READ WRITE CKSUM
        rpool     ONLINE       0     0     0
          c3t4d0  ONLINE       0     0     0
 
errors: No known data errors
 
  pool: sp
 state: ONLINE
  scan: resilvered 315G in 0h46m with 0 errors on Sat Sep 30 02:17:11 2017
config:
 
        NAME        STATE     READ WRITE CKSUM
        sp          ONLINE       0     0     0
          mirror-0  ONLINE       0     0     0
            c3t0d0  ONLINE       0     0     0
            c3t1d0  ONLINE       0     0     0
            c3t2d0  ONLINE       0     0     0
 
errors: No known data errors

New disk had been added and synced successfully!

Configure Link Aggregations on Solaris 11 with HP PS1810

LACP – Link Aggregation Control Protocol

链路聚合成员接口管理常用的两种形式

  • 静态聚合 (Static Link Aggregation):不需要使用控制协议(i.e 不使用基于网络的协议),通过手工配置生效,当聚合口组成员端口启动后,立即生效(成为活动的成员端口)。
  • 动态LACP聚合 (LACP):需要使用链路聚合控制协议(LACP),端口通过配置加链路聚合组,但是否生效(被选中成为活动的成员端口)取决于LACP的协商结果。其中包含主动和被动两种配置。
    • Active LACP: the port prefers to transmit LACPDUs and thereby to speak the protocol, regardless of whether its counterpart uses passive LACP or not (preference to speak regardless).
    • Passive LACP: the port prefers not transmitting LACPDUs. The port will only transmit LACPDUs when its counterpart uses active LACP (preference not to speak unless spoken to).

未考证引用

“链路聚合分为动态与静态两种,静态模式的链路聚合会造成不可预料的问题,在多数情况下建议使用动态模式下的链路聚合,使用链路聚合控制协议自动去协商、评估、聚合链路。”

https://zhuanlan.zhihu.com/p/27387592

首先在PS1810交换机上配置需要使用聚合的端口,并选择LACP Active模式。
登录PS1810,切换至Trunks ► Trunk Configuration

此处设置端口3和4配置链路聚合
HP-PS1810

登录到Solaris进行配置

# list data links
root@solar-1:~# dladm show-link
LINK                CLASS     MTU    STATE    OVER
net0                phys      1500   up       --
net1                phys      1500   up       --
 
# list interfaces
root@solar-1:~# ipadm show-if
IFNAME     CLASS    STATE    ACTIVE OVER
lo0        loopback ok       yes    --
net0       ip       ok       yes    --
net1       ip       ok       yes    --
 
# remove existing interfaces
root@solar-1:~# ipadm delete-ip net0
root@solar-1:~# ipadm delete-ip net1
 
# create LAG (LACP Active) over interface net0 and net1
root@solar-1:~# dladm create-aggr -L active -l net0 -l net1 aggr0
 
# list LAG
root@solar-1:~# dladm show-aggr
LINK              MODE  POLICY   ADDRPOLICY           LACPACTIVITY LACPTIMER
aggr0             trunk L4       auto                 active       short
 
# create IP for aggr0 interface
root@solar-1:~# ipadm create-ip aggr0
 
# list interfaces
root@solar-1:~# ipadm show-if
IFNAME     CLASS    STATE    ACTIVE OVER
lo0        loopback ok       yes    --
aggr0      ip       down     no     --
 
# list data links
root@solar-1:~# dladm show-link
LINK                CLASS     MTU    STATE    OVER
net0                phys      1500   up       --
net1                phys      1500   up       --
aggr0               aggr      1500   up       net0 net1
 
# create address for aggr0 with DHCP
root@solar-1:~# ipadm create-addr -T dhcp aggr0
aggr0/v4a
 
# if you want to static address: ipadm create-addr -T static -a 192.168.1.120/24 aggr0/v4
 
# list addresses
root@solar-1:~# ipadm show-addr
ADDROBJ           TYPE     STATE        ADDR
lo0/v4            static   ok           127.0.0.1/8
aggr0/v4a         dhcp     ok           192.168.1.4/24
lo0/v6            static   ok           ::1/128

测试
从Solaris上拷贝一个较大的文件,传输过程中拨掉任意一根网线,均不会影响拷贝。

参考:
https://www.thomas-krenn.com/en/wiki/Link_Aggregation_and_LACP_basics#Static_Link_Aggregation
https://zhuanlan.zhihu.com/p/27387592
https://docs.oracle.com/cd/E37934_01/html/E36609/gkaap.html#gafxi

Java keytool

1. import (intermediate) CA cert into Java keystore

keytool -import -trustcacerts -alias quovadis-global-ssl-ica-g3 -file QuoVadis-ICA-G3.cert -keystore cacerts

2. list certs in Java keystore

keytool -list -v -keystore cacerts

gh-ost does not support foreign key

gh-ost was released in August, it might be the best tool to upgrade MySQL table structure online so far. But haven’t gotten a chance to try.

This week, I was preparing release of one of our big sites, which has three big tables need to be upgraded (structure change), they have more than 70 million rows in total, data and index occupy more than 30G space on disk. I tried the normal structure change in MySQL, it took me around 5 hours to finish all changes on all of the three tables. That means we have to close the production site for 5 hours, sounds crazy, but what we did always.

Then, I thought maybe I can try this new tool, gh-ost, which created and tested by GitHub. But, finally, I found it does not support foreign key!

user1@db1:~/gh-ost$ ./gh-ost --max-load=Threads_running=25 --critical-load=Threads_running=1000 --chunk-size=1000 --max-lag-millis=1500 --user="user" --password="******" --host="127.0.0.1" --allow-on-master --database="database1" --table="TRANSACTION2" --verbose --alter="ALTER TABLE TRANSACTION2 MODIFY COLUMN TEMP_GH_OST_TEST_FIELD_1 INT NULL" --switch-to-rbr --cut-over=default --exact-rowcount --concurrent-rowcount --default-retries=60 --nice-ratio=0.5 --serve-socket-file=/home/user1/gh-ost/game_tx2/sock.gh-ost.database1.TRANSACTION2 --throttle-flag-file=/home/user1/gh-ost/game_tx2/flag.gh-ost.database1.TRANSACTION2.throttle --panic-flag-file=/home/user1/gh-ost/game_tx2/flag.gh-ost.database1.TRANSACTION2.panic.flag --postpone-cut-over-flag-file=/home/user1/gh-ost/game_tx2/flag.gh-ost.database1.TRANSACTION2.postpone.flag
2016-10-06 03:54:25 INFO starting gh-ost 1.0.20
2016-10-06 03:54:25 INFO Migrating `database1`.`TRANSACTION2`
2016-10-06 03:54:25 INFO connection validated on 127.0.0.1:3306
2016-10-06 03:54:25 INFO User has ALL privileges
2016-10-06 03:54:25 INFO binary logs validated on 127.0.0.1:3306
2016-10-06 03:54:25 INFO Restarting replication on 127.0.0.1:3306 to make sure binlog settings apply to replication thread
2016-10-06 03:54:26 INFO Table found. Engine=InnoDB
2016-10-06 03:54:54 INFO Found foreign key on `database1`.`ALARM_LOG` related to `database1`.`TRANSACTION2`
2016-10-06 03:54:54 INFO Found foreign key on `database1`.`TRANSACTION2` related to `database1`.`TRANSACTION2`
2016-10-06 03:54:54 INFO Found foreign key on `database1`.`UNKNOWN_WIN` related to `database1`.`TRANSACTION2`
2016-10-06 03:54:54 ERROR Found 5 foreign keys related to `database1`.`TRANSACTION2`. Foreign keys are not supported. Bailing out
2016-10-06 03:54:54 FATAL 2016-10-06 03:54:54 ERROR Found 5 foreign keys related to `database1`.`TRANSACTION2`. Foreign keys are not supported. Bailing out

Aixs2: disable chunked encoding

It seems that iCheque doesn’t support chunked transfer in their new version of payment API, but chunked transfer is enabled in AXIS2 by default, so you will get

org.apache.axis2.AxisFault: Transport error: 411 Error: Length Required

When chunked transfer is enabled, the Content-Length will not be present in the HTTP header of request. Because by using chunked transfer, the sender can dynamically generate the content, and send it, the sender doesn’t need to know the length of the content. Another HTTP header, Transfer-Encoding: chunked, will be put in.

If the receiver doesn’t support chunked transfer, you have to disable it.

In AXIS2, you can disable it like this

serviceStub._getServiceClient().getOptions().setProperty(org.apache.axis2.transport.http.HTTPConstants.CHUNKED, Boolean.FALSE)

Process state codes in ps

The meaning of values of column STAT in output of ps command on Linux.

PROCESS STATE CODES
       Here are the different values that the s, stat and state output specifiers (header "STAT" or "S") will display to describe the state of a process:
       D    uninterruptible sleep (usually IO)
       R    running or runnable (on run queue)
       S    interruptible sleep (waiting for an event to complete)
       T    stopped, either by a job control signal or because it is being traced.
       W    paging (not valid since the 2.6.xx kernel)
       X    dead (should never be seen)
       Z    defunct ("zombie") process, terminated but not reaped by its parent.
 
       For BSD formats and when the stat keyword is used, additional characters may be displayed:
       < high-priority (not nice to other users)
       N    low-priority (nice to other users)
       L    has pages locked into memory (for real-time and custom IO)
       s    is a session leader
       l    is multi-threaded (using CLONE_THREAD, like NPTL pthreads do
       +    is in the foreground process group.

Compile, install Apache Portable Runtime (APR) on Ubuntu

Compile and install APR
root needed!

Download source packages, apr-1.5.2.tar.gz and apr-util-1.5.4.tar.gz, from Apache site, https://apr.apache.org/download.cgi

Unpack the packages to /root/apache/apr-1.5.2 and /root/apache/apr-util-1.5.4

Installation path: /usr/local/apr

# compile and install apr
# /root/apache/apr-1.5.2
./configure --prefix=/usr/local/apr
make
make install
# compile and install apr-util
#/root/apache/apr-util-1.5.4
./configure --prefix=/usr/local/apr/lib --with-apr=/usr/local/apr
make
make install

For Tomcat
Compile and install tomcat native
Go to tomcat/bin, unpack tomcat-native.tar.gz, then go to tomcat-native-1.1.29-src/jni/native, compile and install tomcat-native

# /home/root/apache-tomcat-7.0.53/bin/tomcat-native-1.1.29-src/jni/native
./configure --with-apr=/usr/local/apr --with-java-home=/usr/lib/jvm/java-VERSION-oracle/
make
make install

Configuration
In the start script of Tomcat, add

CATALINA_OPTS="$CATALINA_OPTS -Djava.library.path=/usr/local/apr/lib"

In conf/server.xml, update protocol of connectors to use the following protocols,

org.apache.coyote.http11.Http11AprProtocol
org.apache.coyote.ajp.AjpAprProtocol

Restart tomcat, if you see the following in the catalina.out and no exception, the APR is running.

...
INFO: Loaded APR based Apache Tomcat Native library 1.1.29 using APR version 1.5.2.
Nov 26, 2015 2:58:54 PM org.apache.catalina.core.AprLifecycleListener init
...

iptables 规则行号,删除及插入规则

# 显示iptables规则行号
iptables -nL --line-numbers
# 删除某行规则
iptables -D INPUT 11
# 在某行插入新的规则,原来的规则会自动下移
iptables -I INPUT 13 -s 1.2.3.4 -p tcp -m state --state NEW --dport 22 -j ACCEPT
Pages:  1 2 3 4 5 6